
As I am writing this chair blog I will mention getting my templates out. Templates are sometimes hard to come get without spending large sums of money. I can make templates for anyone using heavy kraft paper purchased at Home Depot. They can be mailed to you for a small fee to cover the material and shipping costs. You do need to know what to do with them once you receive them. This is how I made my wood templates and bending forms. The kraft paper comes in 36" wide rolls and is heavy enough to use as a tracing pattern onto wood or MDF. I use 1/4" MDF for all my templates. If interested you can send me an email: trident98@hotmail.com
Now back to work.....................
Wednesday, March 24, 2010

Carving out the seat
It's been a few months since my last post. I'm finding out that writing takes just as much time as building a piece of furniture. I have been busy making a small size writing desk. I wanted a desk that would be used for writing and some laptop computer work. Before I could get started on my desk, I had to design it. Most of my work as a carpenter, superintendent or project manager in construction started with a set of plans drawn by an architect with all the info one would need to complete the project. Starting without a design is something I had to learn to do. I'm getting a little off the subject of my rocking chair but be patient and read on as I'm getting to it.

I started on a Monday morning sitting in a chair with my drawing notebook, the same notebook I used when taking my first computer class back in 1984 (that is some interesting reading I might add), a small ruler and pencil with a good eraser. Now comes the hard part. Where to start. Well, I actually had the idea for the legs already. I hate to throw out any scraps of nice wood, especially walnut or cherry. I saved the cutoffs from the back legs of a chair because I couldn't throw them out. I was looking for some scrap one day and grabbed them from the bin and as I held them I had an inspiration. I was looking at an end set of legs for a desk.

These are the inside top cutoffs from the back legs of the rocker build. When the back legs are rough shaped I narrow the inside face about 5/8" in. I'll show that process in my next few posts when I get to the leg shaping. If you rotate the pic counter clockwise you will see what I saw at that time. So now I'm feeling like I have a start to a design that is keeping with the type of rocking chairs that I have made. So, here I sit withI my desk complete and ready to take to the photographer for some good pics. I plan on submitting this desk to a woodworking competition that will take place this coming July. Good pictures are important for showing your work to others that can't see first hand what you spent so much time on. The first thing I want to do when looking at what I think is a very nice piece of art or furniture is touch it. Feel the finish. Some woods just seem to come to life when all the finish has been applied. The grain and patterns that light can change will draw your eyes to differnt parts and areas for a closer look and feel. You can't get the same feeling when looking at a picture but a good picture helps in that it makes you want to see more. Keep checking back and in a month or so, I'll post what I hope will be a good picture of my desk. So where was I?.....................oh yah, the carving of the seat. Get ready to get very dusty. I would suggest you take your seat outdoors. I will be using my 4" grinder with a medium Kutzall disc. I have already maked out the seat area that will be shaped. The deepest section in the back will be 3/4" deep and end up 1/2" deep at the front of the chair. The shape will flair up in the center front. I have small 1/8' holes drilled into my template at 9 locations that will act as guides for my depths. I use these holes to drill 1/8" holes to the proper depth. Using a brad point bit will leave a small mark that final sanding will remove. I use my drill press to get the depths correctly drilled. Sam Maloof did this work using his bandsaw to remove a lot of waste prior to glueing up the pieces. I stand corrected again as I was correct in my previous post in that he used a total of 5 pieces for his seats. 4 or 5 doesn't really matter for me. I think if you are just starting a chair for the first time maybe 4 pieces without bevels would be easier to master. By that I mean the seat blank will be flat. With Sam's chairs the pieces were beveled on the sides which saved him some grinding work when shaping the seat bottom. You still have to shape the top either way.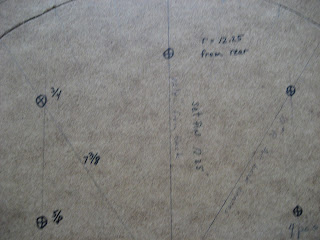
 I think one thing to keep in mind is that this is a chair I am building and I am free to make any changes I want unless you have a client that has very specific dimensions. I am very inspired by Maloof's work but also want to make it my work. So, If your seat profile isn't exactly like mine or his that's not a bad thing. These are dimensions that work for me. When I get to the actual grinding it may change because of an "oops". Went to far! Now what? Don't panic just adjust the matching side or area and keep going. Grab some cheap pine boards to practice and you will find it's not as hard as it first looks. It still is dusty. Wear a good mask and put on the eye protection. Word of caution, the Kutzall disc will take away skin very quickly. Be mindful of setting down the grinder. Wait until the motor stops. I will take a folding work table outside and clamp the seat to it. Warn the neighbors and fire department first and keep the kids back. You will find that once you start shaping, the grain pattern may change and expose some interesting patterns. You may also encounter some insect holes, knots or other imperfections. Not to worry as it's wood.
 I would suggest you take your seat outdoors. I will be using my 4" grinder with a medium Kutzall disc. I have already maked out the seat area that will be shaped. The deepest section in the back will be 3/4" deep and end up 1/2" deep at the front of the chair. The shape will flair up in the center front. I have small 1/8' holes drilled into my template at 9 locations that will act as guides for my depths. I use these holes to drill 1/8" holes to the proper depth. Using a brad point bit will leave a small mark that final sanding will remove. I use my drill press to get the depths correctly drilled. Sam Maloof did this work using his bandsaw to remove a lot of waste prior to glueing up the pieces. I stand corrected again as I was correct in my previous post in that he used a total of 5 pieces for his seats. 4 or 5 doesn't really matter for me. I think if you are just starting a chair for the first time maybe 4 pieces without bevels would be easier to master. By that I mean the seat blank will be flat. With Sam's chairs the pieces were beveled on the sides which saved him some grinding work when shaping the seat bottom. You still have to shape the top either way.
 I think one thing to keep in mind is that this is a chair I am building and I am free to make any changes I want unless you have a client that has very specific dimensions. I am very inspired by Maloof's work but also want to make it my work. So, If your seat profile isn't exactly like mine or his that's not a bad thing. These are dimensions that work for me. When I get to the actual grinding it may change because of an "oops". Went to far! Now what? Don't panic just adjust the matching side or area and keep going. Grab some cheap pine boards to practice and you will find it's not as hard as it first looks. It still is dusty. Wear a good mask and put on the eye protection. Word of caution, the Kutzall disc will take away skin very quickly. Be mindful of setting down the grinder. Wait until the motor stops. I will take a folding work table outside and clamp the seat to it. Warn the neighbors and fire department first and keep the kids back. You will find that once you start shaping, the grain pattern may change and expose some interesting patterns. You may also encounter some insect holes, knots or other imperfections. Not to worry as it's wood.
I like to start on the back deepest areas and work my way forward. Picture yourself sitting in wet cement and waiting until it hardens. The impression you would make is what we are trying to achieve. I actually thought about doing something similiar to that with drywall compound and making a mold to look at. After doing a few chairs you kind of get the hang of it. Or, you could get one of those expensive CNC machines that can make thousands of the same piece. Yuk, how boring is that. After you get most of the waste removed you can sit in the seat and feel where you need to shape. This is the very high tech sander that I use after I get finished with the rough grinding process. It's a 6" grinding pad with a 5/8" bolt for a handle. I will use 60 grit paper to start, then 80 and all the way up to 220 grit and then stop. I want to fit the legs and cut the side and back profiles before finish sanding. I know that when dry fitting the legs and shaping the legs to the seat will make some scratches so I wait until the legs have been shaped and glued to the seat before final sanding.
 In this picture you can see how the front seat area rises up to a dull point in the center. When you get to this point in the shaping, hopefully you didn't run into your seat dowels or biscuits used to join the seat blanks. Not sure I mentioned this earlier in another post. That would be an important tip. Make sure your dowels or biscuits are low enough so that you won't expose them during the seat shaping. You can also see the sapwood high lighted in the center. This worked well for this chair.
 This is the very high tech sander that I use after I get finished with the rough grinding process. It's a 6" grinding pad with a 5/8" bolt for a handle. I will use 60 grit paper to start, then 80 and all the way up to 220 grit and then stop. I want to fit the legs and cut the side and back profiles before finish sanding. I know that when dry fitting the legs and shaping the legs to the seat will make some scratches so I wait until the legs have been shaped and glued to the seat before final sanding.
 In this picture you can see how the front seat area rises up to a dull point in the center. When you get to this point in the shaping, hopefully you didn't run into your seat dowels or biscuits used to join the seat blanks. Not sure I mentioned this earlier in another post. That would be an important tip. Make sure your dowels or biscuits are low enough so that you won't expose them during the seat shaping. You can also see the sapwood high lighted in the center. This worked well for this chair.
carving out the seat profile


I now have the seat pieces glue'd up with the front profile cut. For the front profile, I measure in about 1" centered on each half of the seat. There isn't anything special about this curve so you can make it whatever you want but I wouldn't go more than 1". If the curve is too steep it will hurt the back of your legs when sitting. Now comes the dusty grinding carving part. I take the seat outside for this next step. 
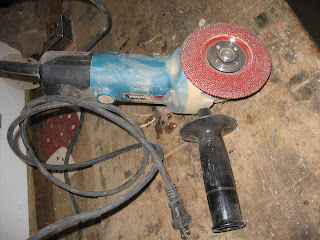
I use a "Kutzall" disc in my 4" grinder. This takes a little practice so grab a scrap and just start carving. I will make sweeping grindes in an arc that follows my template. This disc can be very aggressive or very light. I was hesitant at first but then after many uses I got to the point of using it on other areas. I will also use the Kutzall on the headrest and front seat profile. Sometimes I am a little more daring and use it on the leg to seat profile at the joints. Before grabbing the grinder I will mark out the seat high and low points, the back radius and sides. Time to grab the seat template again. 

Tuesday, January 19, 2010
Continue with the seat
 I like using heartwood or sapwood in my furniture. I know some don't. I think it's all part of the wood that gives it character. It's different and you won't see it in production pieces.
 The material I use for this router jig is hard maple. You can get it at Home Depot. Don't use soft wood like pine for jigs. Every dent and chip will follow you later so again, take your time in making your jigs.
 I need to correct myself in regards to the number of seat pieces Sam Maloof used for his seats. He also used 4 pieces about the same size in width. He did bevel the sides of each piece 3 degrees I believe to give his seats a wavy look on the bottom. This eliminated some of the shaping needed. The results are the same for the final top of the seat but the bottom of my chair seats are flush and straight. I do contour the bottom a little in the front.
I like to cut the front and rear leg dados before glue up of the seat pieces. It is much easier to do this with one small piece rather than the whole seat. Same with the rear leg corner notch. The finish seat width will be about 22". The depth will also be about 22". The material is 1-3/4" thick.This is a medium size seat. You will see that I'm using a piece with heartwood on the edge. The front right piece also has the same heartwood on the corner as I'm trying to make the seat semetrical. It doesn't have to be but this is where pre planning your wood really pays off in the end. Keep in mind that the seat is one of the first things the eye will focus on.

I use a very good saw blade in my table saw to cut all the pieces to width. I don't use the joiner as the rip cutting saw blade leaves the edge very smooth. It pays to get a better blade otherwise you will need to join the edges before glue up. If you are not sure about what kink of blade to buy do a little research on the internet or visit your local woodworking store and you will get plenty of opinions and help. Don't use a general purpose blade. Get one for ripping up to 2" thick wood. When I'm doing crosscutting on the table saw, I switch to a TCG blade. Triple Chip Grind. You could also use a dado blade for the front leg dados but I like using a router. I made a simple jig which is clamped to the side ofa the piece in my vice and then route to a depth of 1". The finished dado will be 1" deep x 2" wide and 1-1/2" in front the front edge. I use a 1/2" spiral up cut bit. The same bit I used for the headrest. Be very careful with these cuts as the bit that shapes the rounded edges will follow these lines. Make multiple passes and go slowly but not to slow as to burn the wood. Pratice on some scrap wood if you are not sure. I make practice cuts on everything. I always have some poplar wood laying around which I like to use as it's not too hard or soft a wood and cheaper than cherry or walnut. You will need some poplar for the forms we will make to form the back braces and the runners.
The front leg notches in the seat are fairly easy to do. The rear leg cuts are a little more involved. I use my table saw. I'm going to be making a corner notch 1 -1/2" deep x 3" long. There are a couple of methods used to make this joint. One is to make the notch with 90 degree cuts on both cuts that form the right angle. This is not hard to do on the table saw using a miter fence guide. It's straight forward and easy to do. It becomes more involved when making the rear leg piece. Most of us that build these chairs will want the rear legs to open up at the top of the chair by 5 degrees. In other words, if you look at the chair straight on from the front, you will see that the rear legs slant to the outside by 5 degrees. This gives the chair a very relaxed look and feel. A dining room chair would be straight or maybe a 3 degree slant to the outside or even to the inside. If you chose to make straight cuts on the rear corners, but you will have to add small tapered pieces to the rear leg material for this joint. I have done it this way for some chairs but now use the same router bits that Sam did for his joints. They are specially made for his work buy a company called Woodline. You can order them online. They come as a set, about $75 for the top and bottom bits. This pic shows the 5 degree top, bottom and straight 1/4" dado bits I use. You will need all three. It also shows the rear seat notch looking from the back of the seat piece. You can see the bevel on the right side. This is a scrap pc of walnut that I keep for reference.
 FLR means flair or bevel. I had to make some adjustments with a small thin shim to get the corner to match due to the bevel. If you have ever seen one of Sam Maloof's videos or were lucky enough to watch him route this notch you will think it's easy. He makes it look easy but he knew where to make the adjustments from making thousands of these joints over the years. Me, I have to take it slow, check, recheck, cut some trial pieces and then hold my breath when finally making the cuts and routs on a good piece of walnut or cherry. Which ever method you use, make sure you get your router bits from the same company. I think this is important. Don't mix and match trying to save a few dollars. The video that helped me was called, A Fine Woodworking DVD Profile, Sam Maloof. It's fun to watch him just grab pieces and route them in his hands using routers that are many years old. He would be the first to tell you not to do it this way as it is extremly dangerous. I respect any tool that spins with sharp objects so I will take the time to make sure the pieces are securely clamped to my work bench or in a vice.
 This pic shows the 5 degree top, bottom and straight 1/4" dado bits I use. You will need all three. It also shows the rear seat notch looking from the back of the seat piece. You can see the bevel on the right side. This is a scrap pc of walnut that I keep for reference.
 FLR means flair or bevel. I had to make some adjustments with a small thin shim to get the corner to match due to the bevel. If you have ever seen one of Sam Maloof's videos or were lucky enough to watch him route this notch you will think it's easy. He makes it look easy but he knew where to make the adjustments from making thousands of these joints over the years. Me, I have to take it slow, check, recheck, cut some trial pieces and then hold my breath when finally making the cuts and routs on a good piece of walnut or cherry. Which ever method you use, make sure you get your router bits from the same company. I think this is important. Don't mix and match trying to save a few dollars. The video that helped me was called, A Fine Woodworking DVD Profile, Sam Maloof. It's fun to watch him just grab pieces and route them in his hands using routers that are many years old. He would be the first to tell you not to do it this way as it is extremly dangerous. I respect any tool that spins with sharp objects so I will take the time to make sure the pieces are securely clamped to my work bench or in a vice.
The seat will be tappered in 1" at the rear notch but don't cut the taper until you finish the complete joint. First cut the 90 degree notch, then route the dados and then you can glue up the seat pieces. That is if you are confident about the legs fitting as they should. If not sure then set the seat aside without glueing up the 4 pieces and move on to the legs. I'll continue with the glueup of the seat and then get to the dusty job of plowing out the seat contour. It will get messy.
 The first cuts need to allow for the back taper you decide on. My taper will be 1" on each side. So I need to allow for this when making the cut in from the side edge. My leg material is 1-3/4" thick plus the 1" taper minus 1/4" for the dado. This means my actual cut length will be 2-1/2" in from the edge. When you route the dado it will add another 1/4" to the overall measurement from the edge. If you make the cut too shallow or deep that is ok as we haven't cut the taper yet. I won't cut the taper until I have made the leg and dry fitted it perfect into the seat notch. It's a custom chair so I don't worry if the taper is changed a little.
Thursday, January 14, 2010
Cutting and shaping the seat
I usually start with the seat but like I mentioned earlier you can start cutting and shaping almost any of the parts. The seat size will vary depending on the size of the person you are making the chair for. My chair is a little more narrow than average because I wanted to make use of the heartwood in the center and the edges so I had to cut it smaller. It still works fine for even bigger people. That's something really nice about this style as the chairs can be fit to you but others will have no trouble using them. Unless you are in the "Biggest Loser" category. Now that would be a big chair.
I make my seats from four (4) pieces. Sam Maloof made his using 5 pcs with bevels on all the edges except for the outer edge. I didn't know this when I made my chair but the end result is the same. The rough seat should be about 23" x 23". This is roughly 1" over size. So you will need 4 pcs 23" long. The width of each piece can be different but keep in mind patterns, grain, heartwood and how each piece will fit together. Also remember that you will be "dishing out" the contour of the seat top. This will change some of the appearance when finished. So you may see something a little different when you finish the seat. I spend a great deal of time interchanging the pieces, using different pieces, flipping them around until I decide on how I want them to glue up and even then I keep my fingers crossed. I haven't been dissapointed yet as even the little surprises make for interesting visuals. That's what we are making. A functional piece of furniture that is also art. It's what gets me every time I see something made by the human hand that just makes you want to reach out and take ahold of it, touch it or keep looking at it. Did I mention that this chair will take about 160 to 180 hrs to complete? Tip: So what, keep going slowly, take your time. Step back and take another look, go get a cold beer, relax, errr wait aminute, get back to work picking out the seat material.
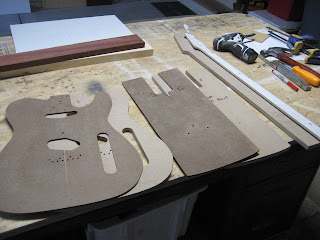
Grab your seat template. What? no template! Not to worry. Just make one. Here is what it should look like.

Sunday, December 27, 2009
Finish sanding the headrest and moving on

After routing the inside and outside curve of the headrest it can now be sanded. I sand to 220 grit and then set the headrest aside. I don't cut it to length just yet. Keep in mind that I've made the headrest out of sequence. Once I have the seat and legs attached I will then cut the headrest to length, dryfit it to the chair and shape it to the legs. All prior to final glue up to the legs.
Saturday, December 12, 2009
shaping the headrest
To shape the headrest I made three jigs. The first two jigs to shape the inner and outer curves using a router. The second to final cut the headrest to length. I won't cut the headrest to final length until almost the last step.
I will use the bandsaw to remove some of the waste prior to the router setup. If you don't have a bandsaw don't worry as the router will work without but the bandsaw saves some router passes.

Cut the added glue strips off flush with the top and bottom. Mark the curve on the top. Both the inner and outer curves. The headrest thickness should be about 1 1/4" thick. I now rough cut the curves with the bandsaw. I try to leave the lines on as the router operation will get the final shape to within sanding size. The bandsaw just gets the basic curve so the headrest will sit in the jig evenly. If you get it to within 1/8" of your line that is good enough. This maybe the perfect time to get that bandsaw you've been wanting if you don't have one. Your spouse should understand unless you already made other promises. In that case, it's chisel time. I have a 14" powermatic with a riser block. I use a 1/4", 6 tooth blade. Again, go slow but steady. If you find the blade drifting backup and re-enter. I sometimes forget to change the blade for cutting the curves, get started and wonder why I can't follow the line or smell smoke. Smoke in a woodshop is not good. The correct blade makes a big difference. Years ago, I had a woodshop in my garage while living in SE Wisc. I made a woodstove out of a 55 gal and a 30 gal drum. The 30 gal was stacked over the 50gal. This allowed more heat to escape into the room before heading out thru the chimney. I would sometimes forget about the dust on the barrels and start smelling smoke when the fire was going and panic. Eventually I learned to clean the outside of the stove before starting the fire. Makes me glad I'm now living in CA. I have a pic of that ole stove somewhere. It was ugly but it sure was cheap to make and it worked very well. My friends and I would play poker around that stove in the winter. 
The first router jig for the headrest is the outer shape. This jig allows the router to follow and correct shape of the curve. I lower the router to take about 1/8" at a time until I reach the mark. Make sure your jig is secure to your work table or bench. Go slow. I use a 1/2" up spiral bit.
The pc that I added to the router base plate was to take up some of the depth of the bit. I didn't want to buy another bit for this at the time. It was from scrape so I ain't pretty but then again most of my jigs are ugly but they work. I seen some jigs that are nicer than the project they are ment for. If it's your first jig, then make it work first and then remake it pretty if you get the time.

I set up a high tech dust collection system for this operation. (cardboard, elect conduit and canvas) I works and keeps the chips all in one area. I now have a rough headrest made of four pieces ready for sanding. This is when I wish I had a 36" drum sander. Wonder if they make such a beast. I guess if you have kids and want to keep them out of trouble you could make a 36" barrel, glue sand paper to it, attach a crank and axle and make them stand there and crank while you hold the headrest to it. Now there's an idea waiting to happen.
Subscribe to:
Posts (Atom)